Making of "The wet bird" - Part 4

Buildings

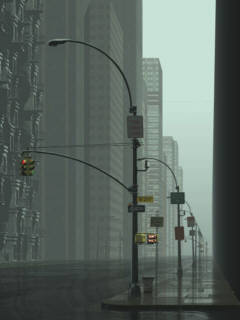
Modelling buildings sometimes starts as good fun, but always turns into the most boring POV-related activity. This was no exception. For a while, I kept retarding the moment when I would have to actually model them by using dummies or even buildings from previous images but unsuitable for this one. The dummies were first just a long box, then a series of randomly sized and coloured boxes. They did fine, but when the picture started to be really complex, it became hard to test it without the realistic buildings.

Textures and dummies

The first step was to find good textures. I knew that I wasn’t going to do it procedurally. A real wall or window structure is very complex, particularly at this scale, and using procedural textures to obtain photorealistic windows would have been a real waste of time and computer memory (I needed hundreds of them). So I took one of my favourite New York books and scanned a dozen of building facades. Every photo was corrected for the parallax, made tileable, and the colors were brightened, contrasted and saturated. Then I devised a system that let me apply a wall/window texture on a box so that the image_map is always scaled with a correct y/x ratio and by an amount related to the theoretical building size, so that all the buildings created that way can be comparable. This system was particulary used to create dummy buildings: a loop would generate 20 or so dummies, each with its randomly chosen size and image maps.

On the right is an early render using the dummies (the building on the right was a dummy taken from a previous image). Of course, every dummy was to be replaced by a real model.

Temporary city

The second building on the left

I started by the second building on the left. The main idea was to apply an image map to its height-field counterpart: the image is converted to black and white, and processed until the all the window are black and the window frames and wall parts are white (or light grey). When the original image map is applied, it makes very realistic windows (at least when seen from afar). The first tests were good but I soon came upon something very disturbing: in Megapov 0.4, a bug sends the raytracer into infinite loops when hitting some height fields (this has been fixed in later versions). This was a real problem, because I couldn’t even foresee when this was going to happen. A single image could take several days to render since I had to stop and restart it several times. So the height fields had to go, and I had to replace them by CSG. And then there was another problem: because the image map wasn’t straight: the windows’ borders were fuzzy and did not form square angles. I then cut up the original image into 34 little pieces: each piece was applied to its own CSG window, in a random fashion. The result was actually better than the height fields, because I had a total control over the building structure.

On the right are 6 examples of these images. All of them was heavily processed, with hightlight/midtone/shadow correction, color saturation and blurring.

f01.jpg (3413 octets) f02.jpg (3423 octets) f03.jpg (3834 octets) w01.jpg (2233 octets) w02.jpg (2326 octets) w03.jpg (2028 octets)

The first building on the left

The first building on the left was the closest to the camera, and thus it had to be very detailed. There’s little to say here: it was pure CSG and it took a whole week to build, floor by floor. I used a real picture as a reference. If you go to (or live in) New York, you’ll see a building like this in front of the Flatiron.

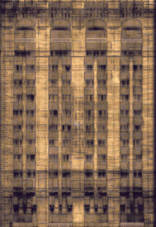
When the CSG was finished, I rendered it with an orthographic camera, and I used the resulting image as a basis for the image map. The dirty streaks were obtained using a "wind" filter that makes the dark parts (the windows) "bleed" in a chosen direction. After much blurring and other complicated processing (no photos involved!), I had an image map that could be precisely superposed to the building. On the right is a small version of the image map.

The last trick involved the windows’ reflections. Since all the windows were identical, it was difficult to have them behave independently. I could have made a macro, but instead I used the "cells" pattern which, applied on a plane directly positioned behind the building, gave the proper effect.

The source and image map for this building are available here.


build_1_maph.jpg (11077 octets)

The Chrystler building

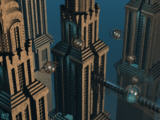
After spending quite a long time on the lamp posts and on the first two buildings, I didn’t want to model anything else for a while. I knew that the 3dcafe had several buildings available, including a model of the Chrysler building that I had used in 1996 in the picture on the right (not featured in the Book of Beginnings).

1996 picture using the Chrysler building model
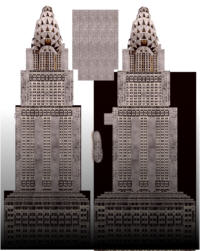
At that time, I had been somehow frustrated that I could not put a good texture on it. But now I had Steve Cox’ UV mapper ! So I downloaded the building again, converted it to the obj format, created the map with the mapper and went to work on the texture. For this, photographs of the real building were mixed with some of the material that I had previously scanned. This took a whole day to do. Since the map and mesh are very big, I won’t release them but here is how the map looks:

You’ll notice how the building bottom was darkened to make it foggy (or smoggy). The building was converted to 3DS (with Poser) and then to the mesh2 format (with 3DS2pov). It’s used twice in the image (the second time only as a "filling" material).

Another building followed exactly the same process (it’s the smaller one at the foot of the Chrysler, on the right).

For a tutorial about UV mapping click here.

Chrysler building map

Other buildings

The other buildings were done more quickly, as unions of boxes with image maps mixed with procedural textures applied on them. I planned to add details but ran out of time.

The building on the right was taken from one of my previous images. It’s a heavy (1200 lines !) CSG construct that took me a week to build a few months ago. I had to modify it a little so that it could fit in the image. You can see this building in the picture Waiting for Noah (it's the one on the right).


Lamp posts

Previous Macros and sources
Table of contents
Next

Miscellaneous objects

tran@inapg.inra.fr