Making of "The wet bird" - Part 2
Atmosphere tuning
The first task was
to create the general atmosphere, because it would tie the whole image together. One
potential problem was that the image would be too dark. In the reference photo, the
buildings were rather low, and there was a large expanse of visible sky. But because of
that, the image wasn’t very impressive. I wanted tall, dark buildings AND enough
light in the scene.
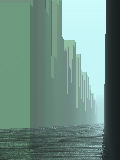
So I created my first test scene, that involved
making randomly-sized dummy buildings, a first sidewalk texture and some fog. On the right
is one of these first trial pictures: |
|
Well, there was still a long way to go, but
these first images were fundamental in trying a good number of combinations of lights and
colours, until I came upon something acceptable. In fact, the atmospheric tuning was
permanent until the very last moments. Particularly, because I did most of the modelling
on a portable with a passive matrix screen, the colours appeared all greenish when shown
on a more reliable CRT. So, instead of wild-guessing the right colours, I sampled them
directly from the reference photo, and later altered them to suit POV. In fact, the same
colour is used throughout the picture for the fog, the skies and most of the lights, but
with different intensities and patterns.
Finally, the atmosphere was the result of the
following:
A sky plane with a bozo pattern for the sky. I
needed a turbulent pattern to break up some of the banding that appears when using
non-turbulent gradients. It may be due to the fact that my screen is configured with 65000
colours, but I didn’t want the image to be ugly on my own computer.
2 vertical planes with a y gradient to
simulate a ground fog effect and to block the view. A large one is placed far away, at
2400 pov units, and a smaller one is halfway, at 1300 pov units.
A filtering fog
5 lights sources (including 3 area lights), 4
of them in front of the camera and 1 behind.
2 dark planes placed behind the camera are
used to kill any parasite reflection.
The focal blur of the far away sky and
buildings.
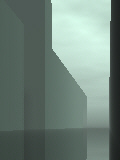
On the right is
the final image, stripped down of all its objects, with the buildings replaced by dummies.
You’ll notice how the colour was changed from the original one.
The source code for this image is here (it can be rendered in regular POV 3.1g). |
|


